Introduction Are you dreaming of a beautiful bathroom makeover without spending thousands of dollars on a professional renovation? The good news is that you don’t need a huge…
Are you dreaming of a beautiful bathroom makeover without spending thousands of dollars on a professional renovation? The good news is that you don’t need a huge budget or an entire construction crew to create a bathroom that feels fresh, stylish, and inviting. With the right DIY bathroom remodel ideas, a little creativity, and some carefully chosen materials, you can transform your space into a relaxing retreat that looks professionally designed.
Whether you have a small guest bathroom, an outdated master bathroom, or a simple rental bathroom that needs a refresh, there are plenty of affordable ways to improve its appearance and functionality. From painting outdated vanities and upgrading hardware to adding stylish mirrors, improving lighting, and creating a spa-inspired atmosphere, even small changes can make a remarkable difference.
The secret to a successful DIY bathroom remodel is knowing where to invest your time and money. Instead of replacing every fixture or tearing out existing tiles, focus on improvements that create the greatest visual impact. Fresh paint, coordinated accessories, clever storage solutions, and updated finishes can help your bathroom look more modern without requiring a complete renovation.
Another advantage of DIY bathroom projects is the opportunity to personalize every detail. You can choose warm neutral colors for a timeless look, incorporate natural wood for a cozy atmosphere, introduce black fixtures for a modern aesthetic, or add greenery and soft textiles to create a spa-like environment. The possibilities are endless, regardless of your bathroom’s size.
In this guide, you’ll discover 10 practical DIY bathroom remodel ideas that combine style, functionality, and budget-conscious planning. Each idea includes suggested materials, helpful step-by-step instructions, styling tips, and practical considerations to help you achieve beautiful results. Whether you’re planning a weekend refresh or a gradual bathroom makeover, these ideas will help you make the most of your space.
Why Choose a DIY Bathroom Remodel?
A DIY bathroom remodel allows you to improve your bathroom at your own pace while maintaining greater control over your budget and design choices. Rather than committing to an expensive renovation immediately, you can prioritize affordable updates and gradually work toward your ideal bathroom.
One of the biggest benefits is that many cosmetic improvements do not require major construction. Painting a vanity, replacing cabinet handles, updating a mirror, organizing toiletries, or installing suitable shelving can dramatically change the appearance of a bathroom without disturbing its plumbing or waterproofing.
DIY projects also give you the flexibility to experiment with different design styles. You might prefer a minimalist bathroom with clean lines and simple accessories, a farmhouse-inspired space with natural wood and vintage details, or a contemporary bathroom with sleek finishes and statement lighting.
However, it is important to distinguish between cosmetic improvements and work that requires professional expertise. Plumbing alterations, electrical work, waterproofing, and changes involving shower enclosures or tiled wet areas may require licensed tradespeople and compliance with local building requirements. In Australia, check the applicable state or territory rules before beginning regulated work.
The best approach is to combine achievable DIY updates with professional assistance wherever safety, durability, or legal requirements demand it.
1. Refresh Your Bathroom Vanity With a Fresh Coat of Paint
Best for: Outdated cabinets, small budgets, and weekend bathroom makeovers
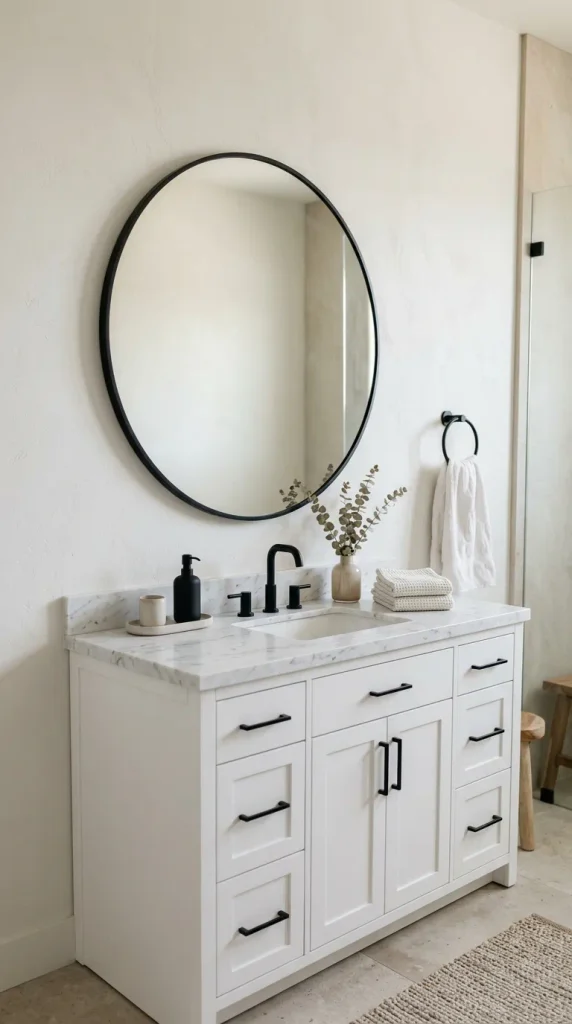
One of the easiest ways to transform an outdated bathroom is to give the vanity a fresh new look. Bathroom vanities often occupy a central position in the room, making their color and finish important to the overall design. If your existing cabinet is structurally sound but looks old-fashioned, repainting it can be much more affordable than replacing it.
The right color can completely change the atmosphere of your bathroom. Soft white creates a clean and timeless appearance, sage green adds a natural touch, and warm beige creates a relaxed, contemporary feeling. For a more dramatic design, consider navy blue, charcoal, or deep forest green paired with brushed brass or matte black hardware.
Materials You’ll Need
Cabinet-appropriate primer
Moisture-resistant cabinet paint
Sandpaper or a sanding sponge
Cleaning solution and lint-free cloths
Paintbrush and small foam roller
Painter’s tape and protective drop cloth
Screwdriver for removing hardware
How to Remodel Your Vanity
Step 1: Clean the surface. Remove dust, soap residue, grease, and other buildup. Paint will not adhere properly to a dirty or greasy surface.
Step 2: Prepare the cabinet. Remove the doors, drawers, and handles. Lightly sand the surfaces according to the paint manufacturer’s instructions, then remove the sanding dust. Repair minor chips or dents with a suitable filler.
Step 3: Apply primer. Choose a primer compatible with your cabinet material and paint. This is especially important for laminate or previously finished surfaces, which may require a specialty bonding primer.
Step 4: Paint in thin coats. Apply the paint evenly, allowing each coat to dry as directed. Two thin coats often produce a smoother result than one thick coat.
Step 5: Finish with updated hardware. Install new handles or knobs that complement your chosen color. Brass looks elegant with green or cream cabinets, while matte black works beautifully with white, gray, and wood tones.
Styling Tips
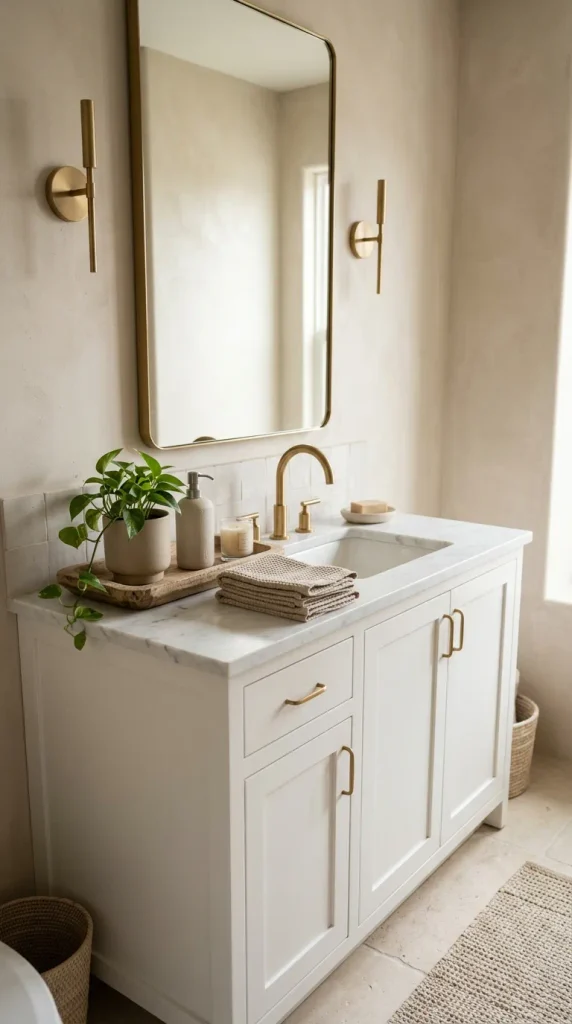
Complete your refreshed vanity with a coordinated soap dispenser, a small decorative tray, and neatly folded hand towels. Keep the countertop relatively clear so the new cabinet finish remains the focal point.
Budget-friendly tip: Reuse your existing handles if they are in good condition. A thorough cleaning or a compatible refinishing treatment may be all they need.
Important: Allow the paint to cure fully before exposing the cabinet to heavy moisture or frequent use. Always check whether the cabinet material is suitable for painting.
2. Install a Stylish Bathroom Mirror for an Instant Upgrade
Best for: Small bathrooms, dated interiors, and inexpensive visual improvements
A bathroom mirror is more than a practical accessory. It can influence how spacious, bright, and polished the entire room feels. Replacing a plain builder-grade mirror with a decorative design is a simple DIY bathroom remodel idea that can make a noticeable difference without requiring a complete renovation.
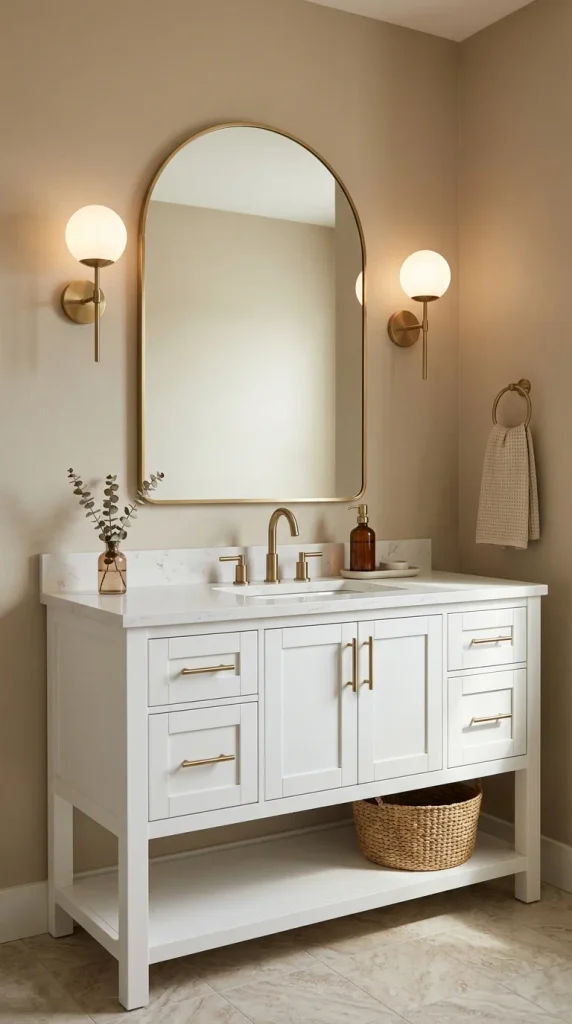
For a timeless look, consider a large rectangular mirror with a thin black frame. Round mirrors soften bathrooms with straight lines and angular cabinetry, while arched mirrors add a graceful architectural detail. If you love a natural aesthetic, a mirror with a light oak or warm wood frame can create a welcoming, spa-inspired atmosphere.
In smaller bathrooms, mirror placement is particularly important. A well-positioned mirror can reflect natural light from a window or brighten a darker corner when placed opposite an appropriate light source.
Materials You’ll Need
A bathroom-suitable mirror
Measuring tape and pencil
A level
Appropriate wall fixings or a rated mirror mounting system
Drill and compatible drill bits, if required
Stud or service detector where appropriate
Cleaning cloth and glass cleaner
How to Upgrade Your Bathroom Mirror
Step 1: Measure the available space. Measure the vanity width and the distance between the countertop and the light fixture or ceiling. Choose a mirror that fits comfortably without crowding surrounding features.
Step 2: Choose the right shape. Rectangular mirrors suit symmetrical layouts, round mirrors introduce softness, and arched designs work well in bathrooms with traditional or contemporary styling.
Step 3: Mark the position. Use a level to establish a straight mounting line. Check that the mirror will sit at a comfortable height for the people using the bathroom.
Step 4: Install the mirror securely. Follow the manufacturer’s instructions and use fixings suitable for the wall material and mirror weight. Before drilling, check for concealed plumbing and electrical services. Heavy mirrors may need professional installation.
Step 5: Finish the surrounding area. Clean the mirror and style the vanity with just a few coordinated accessories.
Styling Tips
Choose a mirror frame that complements your faucets, cabinet handles, and lighting finishes. You don’t need every metal finish to match perfectly, but repeating one or two finishes helps create a cohesive look.
If your budget is limited, a ready-made framed mirror can offer a more straightforward alternative to commissioning a custom design.
Budget-friendly tip: Before purchasing a new mirror, consider whether your existing mirror can be upgraded with a compatible decorative frame. Make sure the frame materials and adhesives are suitable for a humid bathroom.
3. Upgrade Bathroom Hardware for a Modern Look
Best for: Quick DIY projects, rental-friendly refreshes, and contemporary styling
Sometimes, the smallest details make the biggest difference. Old cabinet knobs, worn towel bars, dated toilet roll holders, and mismatched accessories can make an otherwise attractive bathroom feel tired. Replacing these details is one of the simplest ways to give your bathroom a coordinated, modern appearance.
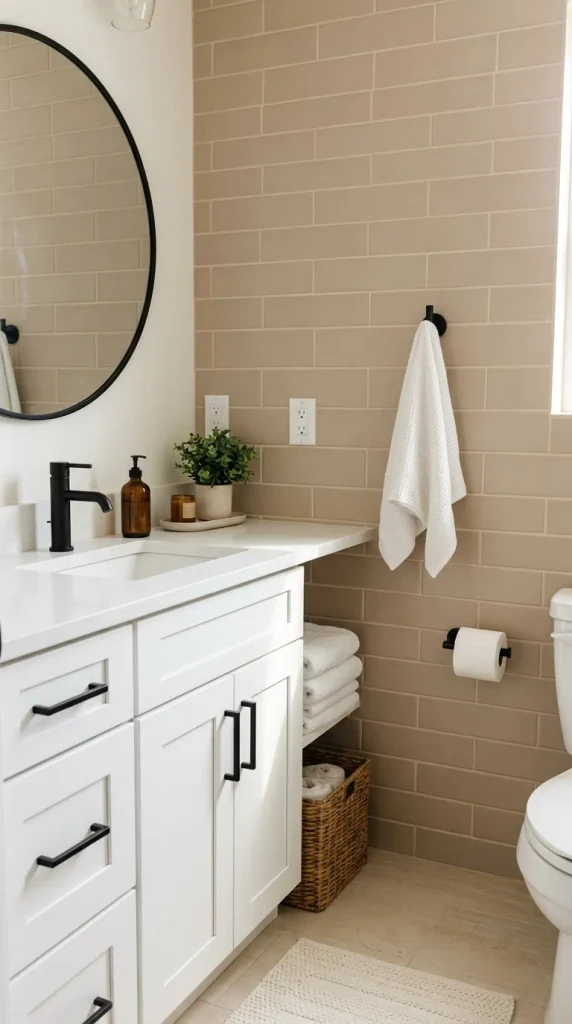
Hardware upgrades are particularly effective because they can connect different elements of the room. For example, matte black cabinet handles paired with black towel hooks and a matching toilet roll holder create a crisp contemporary look. Brushed brass brings warmth to white and cream bathrooms, while brushed nickel offers a softer, versatile finish.
You don’t have to replace every accessory at once. Start with the most visible items and gradually introduce matching pieces as your budget allows.
Materials You’ll Need
New cabinet handles or knobs
Matching towel hooks or bars
A replacement toilet roll holder, if needed
Screwdriver
Measuring tape
Pencil
Suitable wall anchors and fixings
Cleaning cloth
How to Update Your Bathroom Hardware
Step 1: Select a consistent finish. Decide whether you prefer matte black, brushed brass, chrome, or brushed nickel. Consider the existing faucets and shower fittings before choosing.
Step 2: Measure existing holes. If you’re replacing cabinet handles, measure the distance between the screw holes. Buying handles with the same hole spacing can prevent unnecessary drilling and filling.
Step 3: Remove the old hardware. Carefully unscrew the existing handles, hooks, or holders. Clean the surrounding surfaces before installing the replacements.
Step 4: Install the new pieces. Attach cabinet hardware using the existing holes where possible. For wall-mounted accessories, use fixings appropriate for the wall material and the expected load.
Step 5: Coordinate the finishing touches. Repeat your chosen finish in two or three places, such as the vanity handles, towel hooks, and toilet roll holder.
Styling Tips
For a modern bathroom, choose simple shapes and understated finishes. For a traditional bathroom, consider rounded knobs, elegant brass details, or classic chrome fittings.
Avoid adding too many competing finishes or decorative details. A few carefully selected pieces usually look more expensive than a collection of unrelated accessories.
Budget-friendly tip: Replace the cabinet handles first. Because they are easy to notice and relatively inexpensive, they can provide an immediate visual improvement without changing the vanity itself.
Practical consideration: If you are renting, choose removable accessories only when they are suitable for your wall finish and can be removed without causing damage. Always check your lease before making alterations.
4. Create a Spa-Inspired Bathroom With Natural Materials
Best for: Relaxing bathrooms, neutral interiors, and wellness-inspired decor
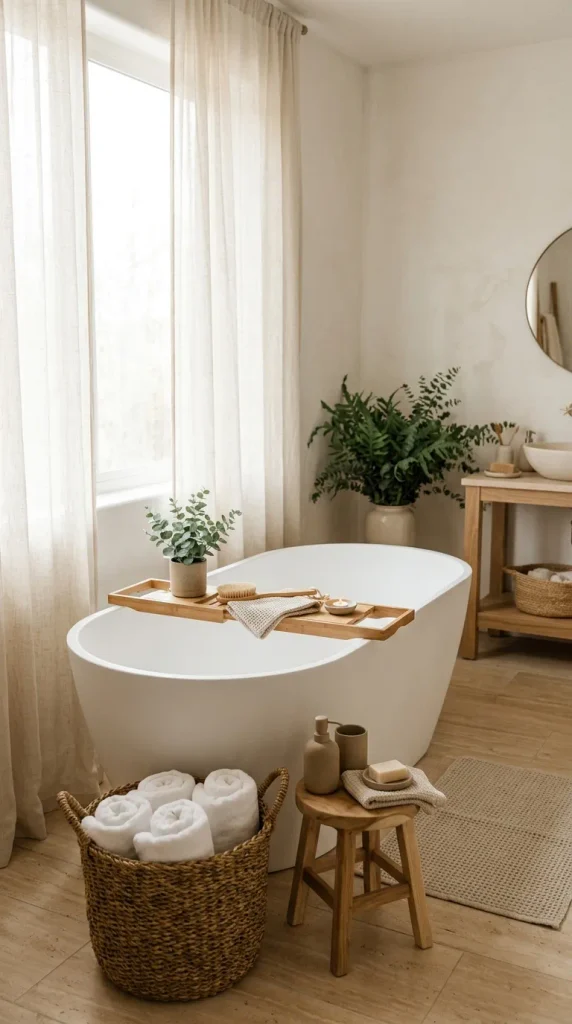
If you want your bathroom to feel like a peaceful spa, focus on natural textures, warm colors, soft lighting, and simple accessories. You don’t need an expensive soaking tub or a luxury renovation to achieve this look. A few thoughtfully chosen materials can create a calm atmosphere that makes everyday routines feel more enjoyable.
Start with a neutral color palette. Warm white, sandy beige, soft taupe, and light gray provide a soothing foundation. Then introduce natural textures through wood accessories, woven baskets, cotton towels, and stone-inspired decorative pieces. These materials add visual depth without making the room feel cluttered.
Natural wood works particularly well in bathrooms with white tiles and simple cabinetry. A wooden bath caddy, small stool, or countertop organizer can soften hard surfaces and create a more welcoming environment. If solid wood is unsuitable for your bathroom’s humidity, consider properly sealed alternatives or bathroom-rated wood-look products.
Materials You’ll Need
Neutral-colored bath towels
Wooden or moisture-resistant accessories
Woven storage baskets
A coordinating soap dispenser
A small decorative tray
Warm-white bathroom-suitable lighting, where appropriate
Bathroom-safe plants or artificial greenery
A nonslip bath mat
How to Create a Spa-Inspired Bathroom
Step 1: Simplify the color palette. Remove unnecessary visual clutter and choose two or three complementary colors. Warm white, beige, and natural wood create a particularly timeless combination.
Step 2: Upgrade your textiles. Replace worn towels with soft, coordinated towels. Roll a few clean hand towels in a basket or stack them neatly on an open shelf.
Step 3: Introduce natural textures. Add a wooden tray, a woven basket, or a small stool outside wet areas. Choose products that tolerate bathroom humidity and keep absorbent materials dry.
Step 4: Improve the lighting atmosphere. Use warm-white ambient lighting where appropriate, while maintaining bright, suitable task lighting around the mirror. Bathroom electrical work should be handled according to applicable safety requirements.
Step 5: Keep the countertop simple. Display only a few useful items, such as a soap dispenser, a small tray, and a carefully selected decorative accessory.
Styling Tips
Choose fluffy towels in white, oatmeal, or muted sage. If you want greenery, select plants suited to your bathroom’s actual light and humidity conditions. Bathrooms without windows may be better suited to artificial plants.
A clean countertop and coordinated accessories are just as important as the materials themselves. The goal is to create a space that feels peaceful rather than crowded.
Budget-friendly tip: Begin with towels, a bath mat, and a storage basket. These affordable additions can make the bathroom feel more luxurious without changing any permanent fixtures.
5. Give Your Bathroom Walls a Fresh New Look
Best for: Dated walls, color refreshes, and affordable cosmetic renovations
Refreshing your bathroom walls is an effective way to make an old space feel clean and updated. Color affects the atmosphere of the room, while carefully chosen finishes can help the bathroom feel larger, brighter, or more sophisticated.
White remains a popular choice because it reflects light and creates a fresh appearance. However, warm white, pale greige, muted sage, and soft blue can introduce more personality without overwhelming a small space.
For a modern bathroom, consider painting the dry wall areas in a warm neutral shade and keeping existing white tiles. This combination allows the room to feel updated without the expense and disruption of replacing the entire tiled surface.
Materials You’ll Need
Bathroom-appropriate paint
Compatible primer
Cleaning supplies
Painter’s tape
Drop cloths
Paintbrush and roller
Filler and suitable preparation tools
Sandpaper, if required
Protective equipment recommended by the product manufacturer
How to Refresh Bathroom Walls
Step 1: Inspect the walls. Look for peeling paint, stains, cracks, and signs of persistent moisture. Resolve leaks and moisture problems before decorating.
Step 2: Choose a suitable paint. Select a coating intended for bathroom conditions and compatible with the existing wall surface. A washable, moisture-resistant finish is often practical for dry wall areas exposed to humidity.
Step 3: Prepare the surface. Clean the walls, repair minor defects, and allow the surface to dry completely. Use primer where the product system requires it.
Step 4: Protect surrounding areas. Cover the floor, vanity, fixtures, and other surfaces. Use painter’s tape around edges that need a clean finish.
Step 5: Apply the paint. Work in manageable sections and follow the manufacturer’s instructions for drying times and ventilation. Apply additional coats if needed for even coverage.
Styling Tips
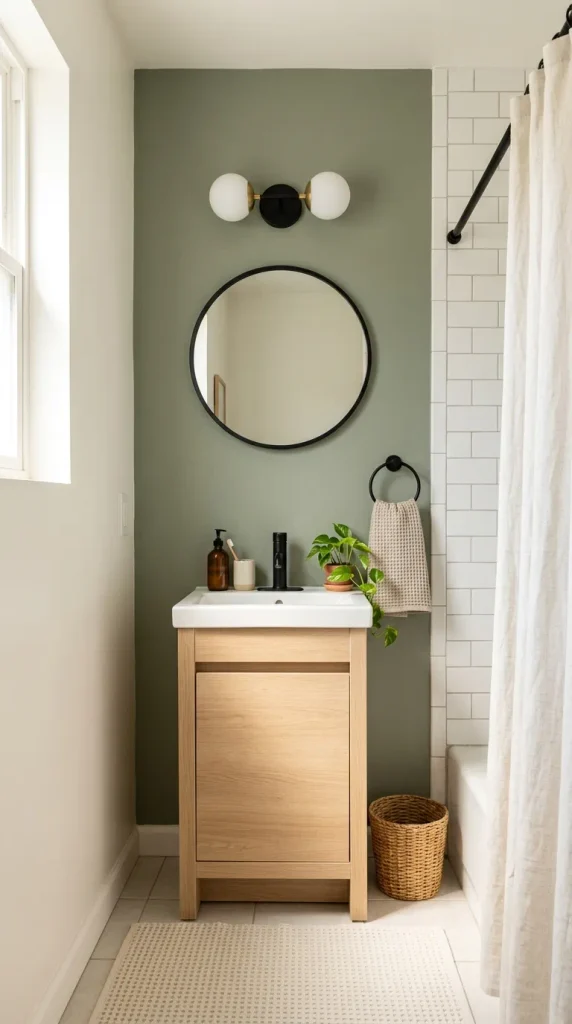
Use lighter colors if your bathroom receives little natural light. A deeper shade can work beautifully on one dry wall in a larger bathroom, especially when balanced with pale tiles and light-colored towels.
Avoid assuming ordinary wall paint is suitable for shower interiors. Painted surfaces inside wet zones require products and systems specifically approved for that use. Never paint over damaged waterproofing or use paint as a substitute for proper moisture protection.
Budget-friendly tip: Paint the dry walls first and retain the existing tiles. A coordinated wall color can make old tilework feel more intentional and visually integrated.
6. Add Open Shelving for Stylish Bathroom Storage
Best for: Small bathrooms, limited storage, and decorative organization
Storage is one of the most important elements of a successful bathroom remodel. When toiletries, cleaning products, spare towels, and everyday essentials are scattered across the vanity, even a beautifully decorated bathroom can appear messy. Open shelving provides a practical way to organize these items while adding personality to the room.
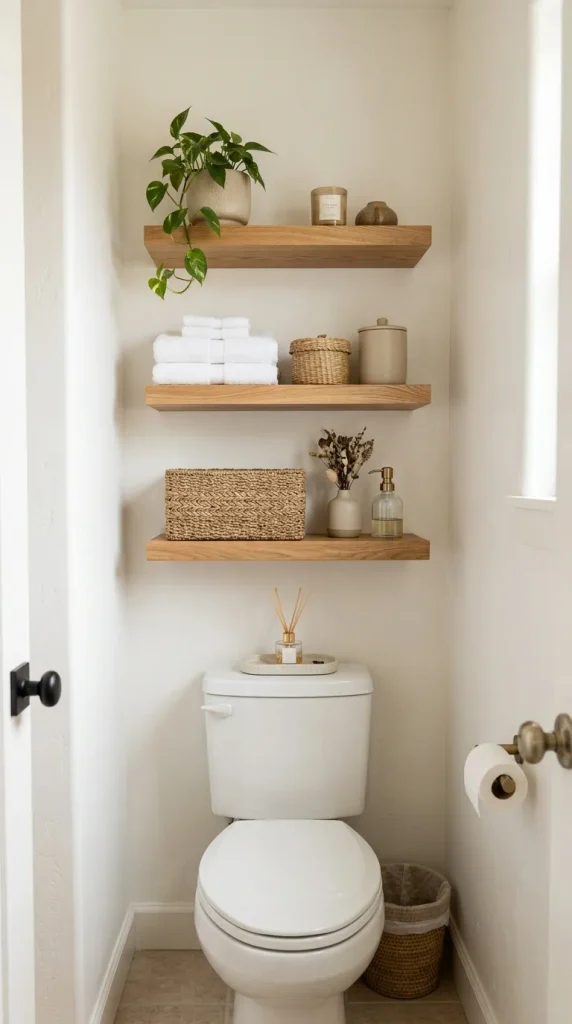
Floating shelves can work above a toilet, beside a vanity, or on an unused wall. In a small bathroom, they help make use of vertical space without taking up the floor area required by a cabinet. Natural wood shelves create warmth, white shelves blend into pale walls, and black shelves add a contemporary accent.
The key is to balance practical storage with attractive styling. Open shelves display their contents, so organization matters as much as the shelf design.
Materials You’ll Need
Bathroom-suitable shelves
Brackets or a compatible floating shelf mounting system
Screws and wall anchors suitable for the wall
Measuring tape
Pencil and level
Drill and appropriate bits, if required
Storage baskets and small containers
How to Install and Style Bathroom Shelves
Step 1: Choose the location. Look for unused wall space that is convenient but does not interfere with doors, fixtures, or comfortable movement.
Step 2: Measure the available area. Check the width, depth, and height of the intended shelves. Above-toilet shelving is popular, but make sure there is enough clearance for normal use and maintenance.
Step 3: Check the wall. Determine the wall construction and select an appropriate mounting method. Check for concealed pipes and electrical services before drilling. Heavy loads may require attachment to structural framing or professional installation.
Step 4: Mount the shelves. Follow the manufacturer’s instructions and use a level to keep them straight. Do not exceed the rated load.
Step 5: Organize the contents. Place frequently used products in accessible containers, spare towels in a basket, and small decorative items in the remaining space.
Styling Tips
Try arranging items in groups of three, varying their height and texture. For example, one basket, a neatly folded towel stack, and a small decorative jar can look balanced without feeling crowded.
Use covered containers for personal items you don’t want on display. Keep shelves away from direct shower spray unless the materials and installation are designed for that environment.
Budget-friendly tip: If you already own sturdy shelves, consider reusing them after checking their condition and suitability for bathroom humidity. A fresh finish and coordinated baskets may be enough to create a cohesive storage area.
7. Update Your Bathroom Lighting for a Brighter, More Modern Space
Best for: Dark bathrooms, outdated fixtures, and improved everyday functionality
Lighting can completely change the appearance of a bathroom. A room with dull, uneven lighting may feel smaller and less inviting, while a thoughtfully illuminated space feels cleaner, more comfortable, and more functional.
A successful bathroom lighting plan usually combines general illumination with task lighting around the mirror. General lighting helps illuminate the room, while suitable mirror lighting makes everyday tasks such as shaving, skincare, and applying makeup easier.
The style of the fixtures also contributes to the design. Simple contemporary fittings complement minimalist bathrooms, while classic wall lights can work well in traditional interiors. Finishes such as brushed nickel, black, or brass can connect the lighting with the bathroom’s other hardware.
Materials You’ll Need
Bathroom-rated LED bulbs or fixtures, as appropriate
A suitable replacement fixture, if needed
A measuring tape
A cleaning cloth
A step ladder for safe access, if appropriate
Product instructions and electrical specifications
How to Improve Bathroom Lighting
Step 1: Evaluate the existing light. Identify dark corners, shadows around the mirror, and areas that need better visibility.
Step 2: Choose the right color temperature. Warm-white lighting creates a relaxing atmosphere, while neutral-white lighting may be useful around a mirror. Consider how the lighting renders skin tones and coordinates with the room’s finishes.
Step 3: Select suitable products. Choose fixtures and bulbs rated for their intended bathroom location. Moisture exposure and the location of showers or baths affect the type of equipment required.
Step 4: Improve the overall arrangement. If the existing lighting is adequate but harsh, changing to compatible bulbs may be sufficient. Additional fixtures can help when the room has significant dark areas.
Step 5: Keep the design consistent. Select lighting finishes that complement the mirror, cabinet hardware, and faucets.
Styling Tips
A well-lit mirror can become a focal point, particularly when paired with a simple vanity and clean countertop. Avoid relying entirely on one overhead light if it creates strong shadows on the face.
Where possible, use layered lighting with separate controls to distinguish everyday task lighting from softer evening illumination.
Important safety note: Electrical installations and alterations in Australian bathrooms are subject to specific safety requirements. Use a licensed electrician for electrical work rather than attempting to replace hardwired fixtures yourself. Never choose a fixture solely because it looks attractive; its suitability for the intended location is essential.
Budget-friendly tip: Start by replacing compatible old bulbs with efficient, appropriately rated LEDs. This may improve brightness and energy efficiency without changing the fixtures.
8. Transform Your Bathroom Floor With a Budget-Friendly Update
Best for: Dated flooring, cosmetic makeovers, and high-impact visual changes
Bathroom flooring occupies a large part of the room’s visual space, so updating its appearance can make the entire bathroom feel newer. However, replacing floor tiles can be expensive and disruptive. If your existing floor is sound, there may be ways to refresh its appearance without undertaking a full flooring renovation.
One option is to thoroughly clean existing tiles and refresh the grout using a compatible grout cleaner, colorant, or repair product. Another is to install a bathroom-rated floating floor or another suitable flooring system over the existing surface, but only when the manufacturer’s requirements and local building regulations allow it.
Flooring products designed for dry rooms should not automatically be considered suitable for bathrooms. Water resistance, slip resistance, installation details, and the condition of the underlying substrate all matter.
Materials You’ll Need
Depending on your chosen project, you may need:
Tile and grout cleaning products
Grout repair or color-refresh products
A suitable floor preparation kit
Bathroom-rated flooring, if replacing the surface
Compatible adhesives and underlay, where specified
Measuring tape and cutting tools appropriate to the product
A nonslip bath mat
How to Refresh Your Bathroom Floor
Step 1: Inspect the existing surface. Look for loose tiles, cracked grout, movement, soft spots, water damage, or signs of leaking. Cosmetic products cannot correct underlying structural or waterproofing problems.
Step 2: Clean the floor thoroughly. Remove soap residue, dirt, and buildup with products appropriate for your tile and grout. Allow the surface to dry completely.
Step 3: Refresh the grout. If the grout is intact but discolored, a compatible grout colorant may help create a cleaner, more uniform appearance. Follow the product’s preparation and application instructions.
Step 4: Consider suitable flooring alternatives. If the existing floor is beyond cosmetic improvement, investigate products specifically approved for bathroom installation. Check moisture limitations, slip performance, transition details, and substrate requirements before buying.
Step 5: Finish with coordinated accessories. A well-sized bath mat and matching towels can make the refreshed floor feel more integrated into the design.
Styling Tips
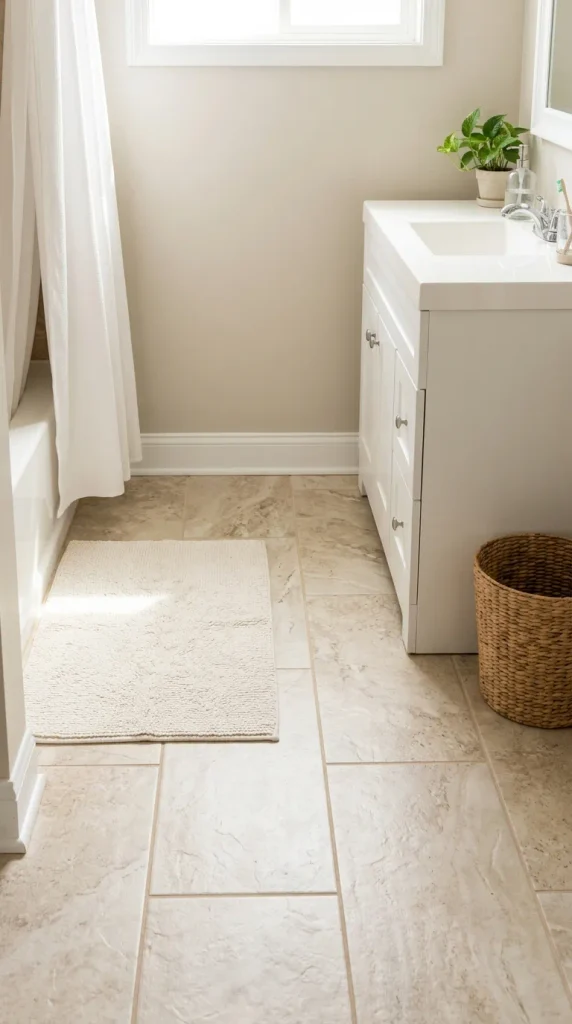
Large-format visual patterns can make a compact bathroom feel less busy. Light stone-inspired tones create a bright, timeless atmosphere, while darker flooring can provide contrast against white cabinetry.
If you want a patterned look, consider introducing it through a bath mat rather than committing to a complicated floor installation.
Budget-friendly tip: Cleaning and refreshing the grout may be enough to make existing tiles look significantly better. This is often a sensible first step before deciding whether replacement is necessary.
Important: Do not paint or cover a floor without confirming that the coating or flooring system is suitable for the specific bathroom conditions. Preserve existing waterproofing, and seek professional advice if you suspect leaks or damage.
9. Introduce Greenery and Decorative Accessories
Best for: Affordable bathroom makeovers, natural styling, and finishing touches
Decorative accessories are an easy way to give your bathroom a fresh personality without spending much money. They allow you to introduce color, texture, and visual interest while keeping the permanent features of the room unchanged.
Plants are particularly popular in spa-inspired bathrooms because they bring a natural element into a space dominated by hard surfaces. Depending on the bathroom’s light and humidity, suitable options may include certain ferns or other plants that tolerate the conditions. However, high humidity alone does not guarantee that a plant will thrive. Light, ventilation, temperature, and watering requirements all need to be considered.
If your bathroom has little or no natural light, high-quality artificial greenery can provide a similar decorative effect without the maintenance.
Accessories also offer an opportunity to coordinate the bathroom’s overall appearance. A matching soap dispenser, toothbrush holder, small tray, wastebasket, and towel set can make an ordinary vanity feel carefully designed.
Materials You’ll Need
A small bathroom-suitable plant or artificial greenery
A waterproof or moisture-resistant planter
A decorative tray
Coordinated soap and lotion dispensers
Matching hand towels
A small wastebasket
A simple artwork print, if suitable for the location
Storage containers for everyday essentials
How to Style Your Bathroom Accessories
Step 1: Choose a design direction. Decide whether you prefer a spa-inspired, minimalist, farmhouse, modern, or natural aesthetic.
Step 2: Select a limited color palette. Choose two or three main colors and repeat them through towels, containers, and decorative details.
Step 3: Add greenery thoughtfully. Place plants where they receive suitable light and will not interfere with the sink, shower, or everyday movement. Use a planter that protects the surrounding surface from water.
Step 4: Group smaller accessories. Arrange soap, lotion, and other frequently used products on a tray. This makes the vanity easier to clean and creates a more organized appearance.
Step 5: Remove unnecessary clutter. Keep daily essentials accessible and store spare products in drawers, cabinets, or baskets.
Styling Tips
For a neutral bathroom, choose white towels, a wooden tray, and greenery for a natural finish. For a more contemporary design, use monochromatic accessories and a few contrasting black details.
Avoid filling every empty surface with decorations. A small number of coordinated pieces often looks more polished than a large collection of unrelated objects.
Budget-friendly tip: Reuse decorative containers you already own, provided they are appropriate for bathroom use and easy to clean. A simple tray and fresh towels may create more visual impact than several expensive accessories.
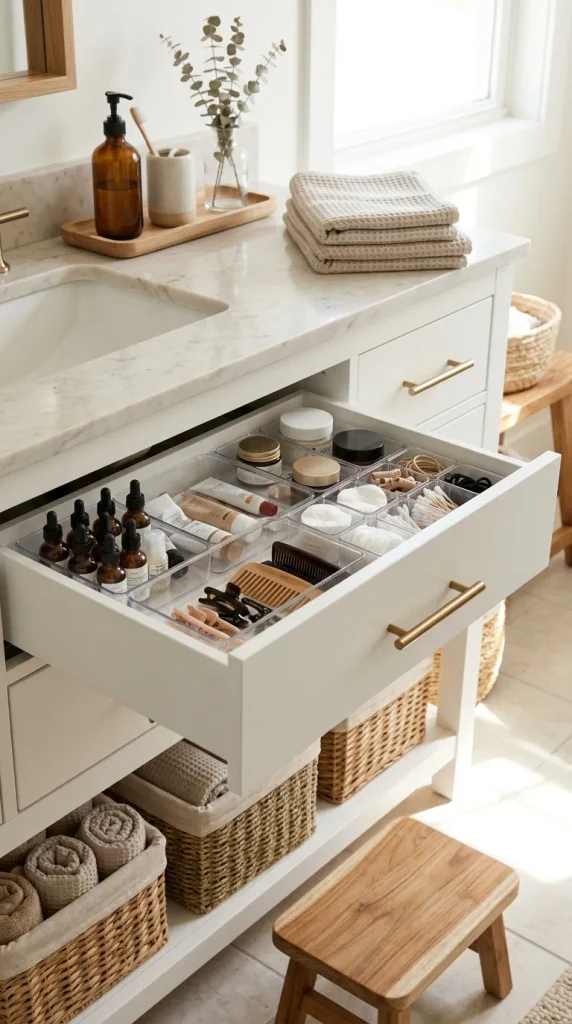
10. Improve Bathroom Storage With a Vanity Organization Makeover
Best for: Small bathrooms, busy family bathrooms, and cluttered countertops
A beautiful bathroom should also be easy to use. Even a stylish remodel can feel incomplete if toiletries, hair tools, cleaning products, and spare supplies have nowhere to go. Improving storage is therefore one of the most practical DIY bathroom remodel ideas, especially in smaller homes where space is limited.
Before purchasing organizers, examine how you currently use the bathroom. Consider which products you reach for every day, which items can be stored elsewhere, and which supplies you need to keep accessible. This helps you select storage solutions that suit your routine rather than adding containers you don’t really need.
The area beneath the vanity is often a good starting point. Stackable bins, pull-out organizers, drawer dividers, and small baskets can make use of otherwise wasted space. Over-the-door organizers or freestanding narrow storage units may also be useful when appropriate for the layout.
Materials You’ll Need
Drawer dividers
Stackable storage bins
Small baskets
Clear containers, if useful
Cabinet organizers
Labels, if desired
Measuring tape
Cleaning cloths
A small tray for daily essentials
How to Organize Your Bathroom Storage
Step 1: Empty the vanity. Remove all products and clean the interior. Check expiration dates and dispose of unwanted items according to the product’s instructions.
Step 2: Group similar products. Create categories such as skincare, haircare, dental care, cleaning supplies, and spare toiletries.
Step 3: Measure your storage space. Check the height, width, and depth of drawers and cabinets before purchasing organizers. Allow room for plumbing pipes, hinges, and door movement.
Step 4: Choose practical containers. Use drawer dividers for small items, bins for grouped products, and baskets for spare towels. Keep products that may leak in suitable containers that are easy to clean.
Step 5: Organize by frequency of use. Place everyday items within easy reach and store occasional-use products in less accessible areas. Keep cleaning chemicals securely separated from toiletries, children, and pets.
Step 6: Maintain the system. Return products to their designated places after use and review the contents periodically to prevent clutter from accumulating again.
Styling Tips
Keep the countertop reserved for a few daily essentials. A soap dispenser, toothbrush holder, and small tray can look coordinated while leaving plenty of working space.
If your vanity has open shelving, use matching baskets to conceal smaller items. Repeating the same container style creates a cleaner appearance and makes the bathroom feel more organized.
Budget-friendly tip: Start by reusing small boxes or containers you already have. Measure your storage areas before buying organizers, so you don’t waste money on products that do not fit.
The most successful storage makeover is one that makes daily routines easier while supporting the overall design of your bathroom.
Essential Materials for a DIY Bathroom Remodel
Before beginning your project, make a materials list based on the updates you plan to complete. You don’t need every item below for every makeover; selecting only what your projects require helps prevent unnecessary spending.
Project
Essential materials
Purpose
Vanity makeover
Primer, cabinet paint, sandpaper, brushes
Refreshing outdated cabinetry
Mirror upgrade
Mirror, measuring tape, suitable fixings
Improving light and visual style
Hardware update
Handles, hooks, screws, screwdriver
Creating a coordinated finish
Spa-inspired decor
Towels, baskets, wood accessories
Adding warmth and texture
Wall refresh
Bathroom paint, primer, rollers
Updating dry wall areas
Open shelving
Shelves, brackets, suitable anchors
Increasing vertical storage
Lighting refresh
Compatible LEDs or suitable fixtures
Improving visibility and atmosphere
Floor refresh
Grout products or bathroom-rated flooring
Improving the appearance of the floor
Decorative styling
Planters, trays, dispensers
Adding personality
Storage makeover
Bins, dividers, baskets
Organizing daily essentials
Tools Worth Having
Measuring tape
Pencil and level
Screwdrivers
Cleaning cloths and suitable cleaners
Paintbrushes and rollers
Painter’s tape
Protective drop cloths
Safety glasses and gloves appropriate to the task
Additional tools may be necessary for specific projects, but avoid purchasing expensive equipment for a single small job when borrowing or renting is practical.
How to Plan Your DIY Bathroom Remodel Step by Step
A little planning can help you avoid common mistakes, control your spending, and achieve a more cohesive result.
Step 1: Assess Your Existing Bathroom
Start by identifying what needs improvement. Look at the vanity, walls, flooring, mirror, lighting, hardware, storage, and accessories.
Separate your findings into two categories: cosmetic issues and functional or safety concerns. Peeling paint, dated handles, and clutter may be suitable for DIY improvements. Persistent leaks, damaged waterproofing, loose electrical fittings, and deteriorating flooring need appropriate professional assessment.
Step 2: Choose a Consistent Design Style
Choose a look before purchasing materials. A consistent design direction helps you make decisions about colors, finishes, textures, and accessories.
Popular bathroom styles include:
Modern minimalist: Clean lines, simple fixtures, and restrained colors.
Spa-inspired: Natural textures, soft neutrals, and uncluttered surfaces.
Farmhouse: Warm wood, classic details, and welcoming textiles.
Contemporary luxury: Large mirrors, coordinated finishes, and carefully layered lighting.
Natural organic: Earthy colors, greenery, stone-inspired finishes, and tactile materials.
You can mix elements from different styles, but repeating a few colors and finishes helps the result feel intentional.
Step 3: Set a Realistic Budget
Determine how much you can comfortably spend before buying anything. Divide your budget into materials, tools, delivery, and a contingency for unexpected cosmetic repairs.
Prioritize updates that offer the greatest visual improvement for your money. Painting a vanity, replacing hardware, organizing storage, and upgrading textiles can be more affordable than replacing fixtures or flooring.
Remember that the cheapest product is not always the best value. Bathroom materials must withstand moisture, cleaning, and regular use.
Step 4: Measure Before Purchasing
Measure the vanity, mirror area, wall space, shelves, and storage compartments. Check product dimensions carefully, especially when working in a compact bathroom.
For mirrors and shelving, consider clearance around lights, taps, doors, and other fixtures. For flooring, verify compatibility with the existing substrate and bathroom conditions.
Accurate measurements help reduce returns, unnecessary drilling, and wasted materials.
Step 5: Work in the Right Order
For a cosmetic makeover, a sensible order is:
Resolve any leaks, moisture problems, or safety concerns.
Remove clutter and clean the room.
Complete wall and cabinet preparation.
Paint suitable surfaces and allow them to cure.
Install approved shelving, mirrors, and hardware.
Complete any suitable flooring refresh.
Organize storage and add decorative accessories.
Clean the finished space and check that everything is secure.
The exact order may change depending on your project. Follow product instructions and avoid damaging existing waterproofing.
Step 6: Finish With the Details
Once the main improvements are complete, step back and assess the entire room. Are the colors coordinated? Is the countertop easy to use? Is the lighting comfortable? Are towels and accessories consistent with your chosen design?
Sometimes, removing one unnecessary item improves the room more than adding another decoration.
Common DIY Bathroom Remodel Mistakes to Avoid
Even simple bathroom projects can become frustrating when preparation is overlooked. Keep these common mistakes in mind as you plan your makeover.
1. Skipping surface preparation. Paint, adhesives, and finishes generally perform better when applied to properly cleaned and prepared surfaces. Follow the product instructions instead of rushing directly into decorating.
2. Choosing materials that cannot handle moisture. Bathrooms experience humidity, splashes, and frequent cleaning. Select materials specifically suited to their intended locations.
3. Ignoring ventilation. Poor ventilation can contribute to condensation, peeling finishes, and mold growth. Make sure existing ventilation works correctly and address persistent moisture problems rather than covering them up.
4. Mixing too many colors and finishes. Too many competing colors, hardware finishes, and decorative styles can make the bathroom look disorganized. Choose a limited palette and repeat a few complementary details.
5. Spending the budget on accessories first. Before purchasing decorative items, prioritize functional improvements and essential repairs. Beautiful accessories cannot compensate for leaks, damaged surfaces, or inadequate storage.
6. Attempting work beyond your experience. Waterproofing, plumbing alterations, and electrical work can involve serious safety risks and regulatory requirements. Arrange appropriately licensed professional assistance when necessary.
7. Forgetting everyday functionality. A bathroom should be easy to clean and comfortable to use. Leave adequate clearance around fixtures, keep frequently used products accessible, and avoid filling every available surface with decor.
Final Thoughts: Create a Beautiful Bathroom on a Budget
A bathroom makeover doesn’t have to involve a complete renovation or an expensive contractor. With thoughtful planning, suitable materials, and a few well-chosen DIY projects, you can create a space that feels cleaner, more modern, and more inviting.
Start with the updates that will make the greatest difference in your existing bathroom. A freshly painted vanity can transform outdated cabinetry, a new mirror can improve the room’s visual balance, and coordinated hardware can bring a polished finish to ordinary fixtures. If your bathroom feels cramped, open shelving and organized storage can improve functionality without taking up valuable floor space.
For a relaxing atmosphere, introduce soft towels, natural textures, subtle colors, and carefully selected accessories. If you prefer a contemporary look, focus on clean lines, consistent finishes, and uncluttered surfaces. You can combine several ideas from this guide to create a design that reflects your personal style.
The most important thing is to work within your budget and recognize which tasks are suitable for DIY. Cosmetic improvements can be rewarding, but underlying plumbing, electrical, or waterproofing problems should be addressed properly before you decorate.
You don’t need to complete all ten projects at once. Start with one manageable improvement, assess the result, and move on to the next when you’re ready. Even a few carefully planned changes can make a meaningful difference to the appearance and functionality of your bathroom.
Your dream bathroom can begin with a simple weekend project. Choose your favorite ideas, gather the necessary materials, and transform your existing space into a bathroom that feels fresh, organized, and beautifully suited to your everyday life.