Introduction Halloween is the perfect time to get creative and transform your home into a spooky, festive, and welcoming space. You don’t need to spend a lot of…
Halloween is the perfect time to get creative and transform your home into a spooky, festive, and welcoming space. You don’t need to spend a lot of money on store-bought decorations to create an impressive Halloween atmosphere. With a few simple supplies, recycled materials, and a little imagination, you can make homemade decorations that bring personality and seasonal charm to every corner of your home. From creepy wall displays to glowing pumpkin crafts, DIY Halloween decorations let you customize your space according to your favorite style.
One of the best things about homemade Halloween decorations is that they can be adapted to suit any budget, age group, or decorating preference. You can choose a cute and playful theme with friendly ghosts and smiling pumpkins, or create a darker, spooky atmosphere with black silhouettes, cobwebs, and flickering lights. Many projects use everyday items such as paper, cardboard, glass jars, fabric scraps, and empty containers, making them affordable and accessible for beginners.
In this article, you’ll discover 10 homemade Halloween decorations ideas that are easy to personalize and suitable for different areas of your home. Whether you’re decorating your front porch, living room, windows, dining table, or entryway, these creative projects will help you celebrate Halloween in style. Each idea includes materials and simple instructions so you can create decorations that look attractive without requiring advanced crafting skills.
1. DIY Hanging Ghost Decorations
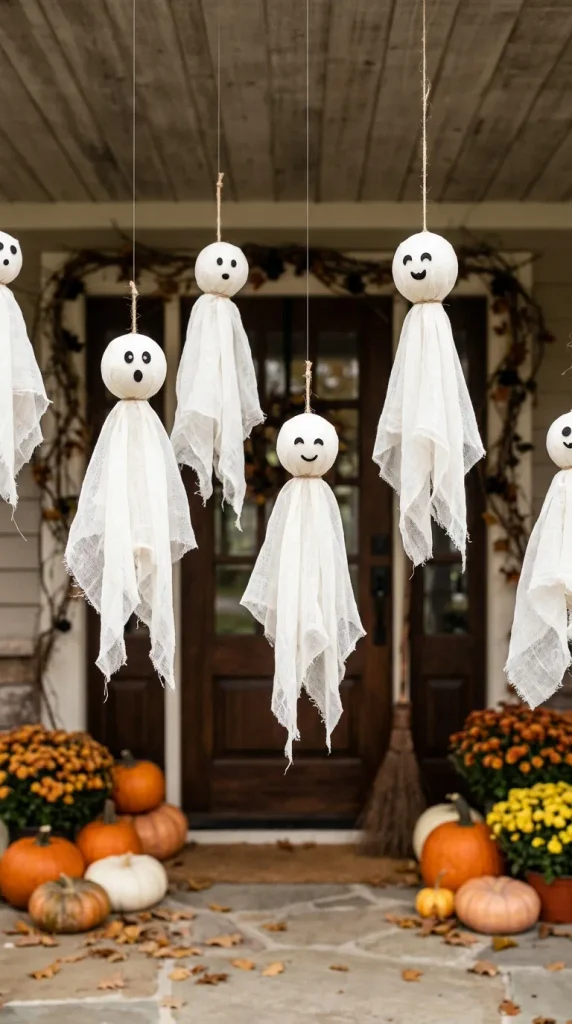
Hanging ghosts are classic Halloween decorations that instantly create a playful spooky atmosphere. They are simple to make, inexpensive, and perfect for decorating porches, doorways, bedrooms, and living rooms. You can make several ghosts in different sizes and hang them together for a more dramatic display.
To make your own hanging ghosts, gather lightweight white fabric, tissue paper, or white cloth, along with string and a lightweight ball or crumpled paper to form the head. Place the material over the ball, gather the fabric beneath it, and tie it securely with string. Attach another piece of string at the top so you can hang the ghost from a ceiling hook or another suitable support.
Add two black eyes using paper shapes or fabric-safe markers. For a friendlier look, create small smiling faces. For a spookier appearance, use larger oval eyes and a simple open mouth. You can also cut the fabric edges into uneven strips to create a floating effect.
Hang your ghosts at different heights near a doorway, in a covered porch, or along a party area. For outdoor displays, choose weather-resistant materials and secure the decorations against wind.
Materials needed: White fabric or tissue paper, lightweight balls, string, scissors, and black paper or markers.
DIY tip: Use lightweight materials so the ghosts move gently with the air. Keep hanging decorations away from ceiling fans, heaters, and open flames.
2. Homemade Halloween Mason Jar Lanterns
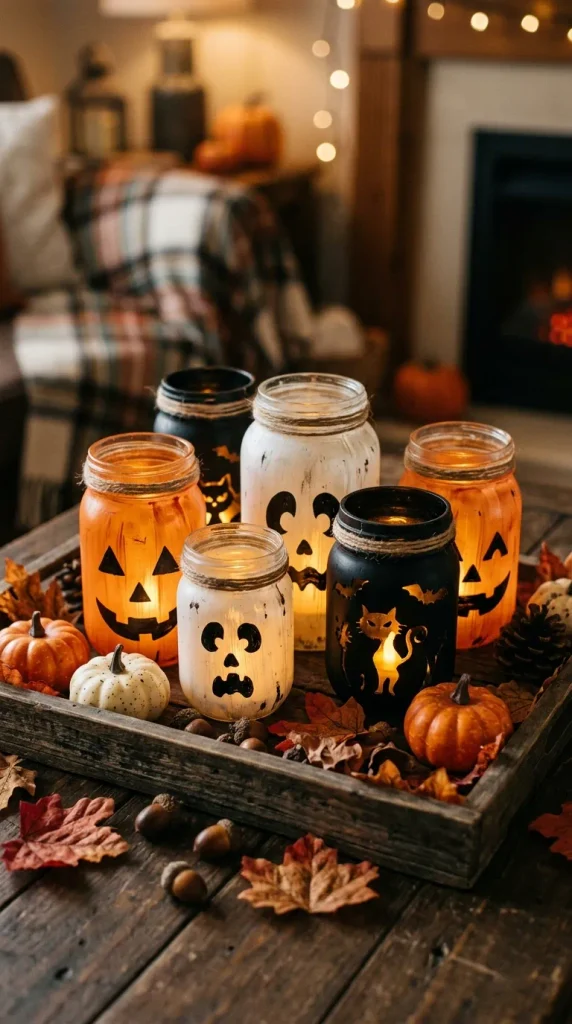
Homemade Halloween lanterns create a warm, atmospheric glow that works beautifully on shelves, dining tables, window ledges, and entryway consoles. Glass jars are particularly useful because they can be decorated in many different ways and reused after Halloween.
Start with clean, dry glass jars. Paint the outside with Halloween colors such as orange, white, purple, or black. You can create a pumpkin face on an orange jar, a ghost face on a white jar, or a spooky silhouette on a dark jar. If you prefer a translucent finish, use suitable glass paint or tissue paper with an appropriate craft adhesive.
Once the decoration is dry, place a battery-operated LED tealight inside each jar. The light will illuminate the painted shapes and create a cozy seasonal glow. You can make a matching set of three jars or create a collection featuring different Halloween characters.
Arrange the lanterns on a tray with artificial leaves, small pumpkins, or black decorative accents. Keep the arrangement balanced so the jars remain the main attraction.
Materials needed: Clean glass jars, craft paint or tissue paper, paintbrushes, black paper, craft adhesive, and battery-operated LED tealights.
DIY tip: Use LED lights instead of real candles, especially when decorating with paper, fabric, or adhesive materials.
3. DIY Halloween Paper Bats Wall Decor
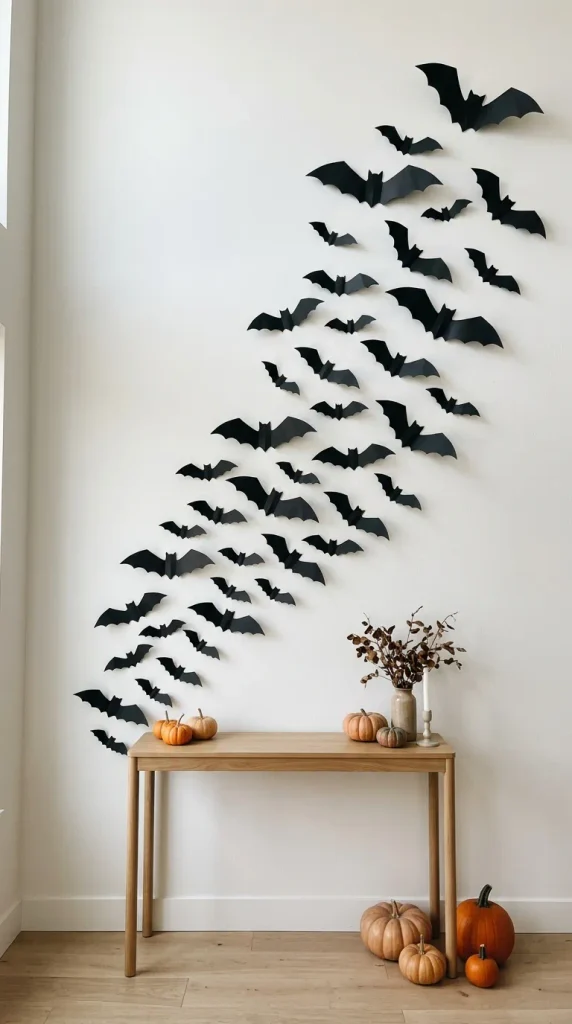
Paper bats are a simple way to create a dramatic Halloween wall display without purchasing expensive decorations. Their dark silhouettes stand out against light-colored walls and can make an ordinary room feel festive in minutes.
Begin by drawing a bat shape on cardstock or printing a template. Fold black paper in half if you want matching wings, then cut out several bats in different sizes. For a three-dimensional effect, gently fold the wings upward while leaving the center flat.
Arrange the bats in a flying pattern that appears to move across a wall. Start with a small group near one corner and gradually increase the number of bats as the design moves upward or toward a doorway. You can also place a few bats around a mirror, framed artwork, or a Halloween party backdrop.
Use removable adhesive suitable for your wall surface. Test it in an inconspicuous area first to reduce the risk of damaging paint or wallpaper.
For a cohesive look, keep the bats black and use a simple arrangement. If you want a more playful design, combine bats with small paper moons or stars.
Materials needed: Black cardstock, scissors, pencil, bat templates, and removable adhesive.
DIY tip: Cut bats in three different sizes to create depth and make the display look more dynamic.
4. Homemade Halloween Pumpkin Decor
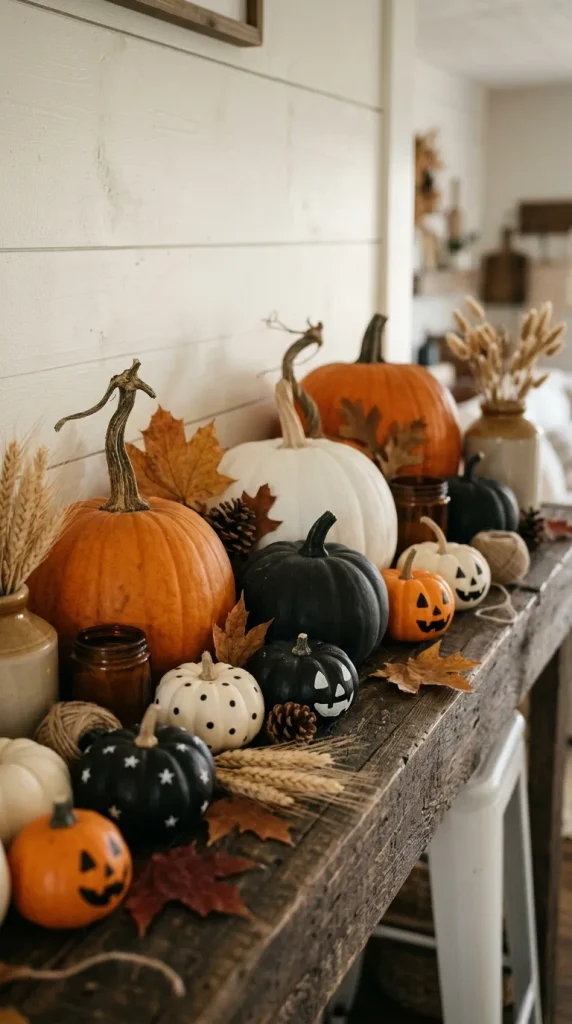
Pumpkins are one of the most recognizable symbols of Halloween, and homemade pumpkin decorations can suit almost any decorating style. You can create traditional orange pumpkins, elegant white versions, or colorful designs that complement your home’s existing decor.
For a simple no-carve pumpkin, start with a clean artificial pumpkin or a real pumpkin with a smooth surface. Paint it orange, cream, white, or black using paint suitable for the material. Once the base coat dries, add a face, geometric pattern, polka dots, or decorative lines.
You can also create mini pumpkins from orange paper, fabric scraps, or lightweight craft materials. Arrange several sizes together on a shelf or tray to create a layered display. For a farmhouse look, combine neutral pumpkins with natural wood accents and muted greenery.
If you’re using real pumpkins, avoid carving them until you’re ready to display them because carved pumpkins deteriorate more quickly. Place real pumpkins in a cool, dry location and inspect them regularly.
Materials needed: Pumpkins or artificial pumpkin forms, suitable craft paint, paintbrushes, markers, and decorative materials.
DIY tip: Choose two or three coordinating colors rather than using every color at once. This helps your pumpkin display look intentional and stylish.
5. DIY Halloween Window Silhouettes
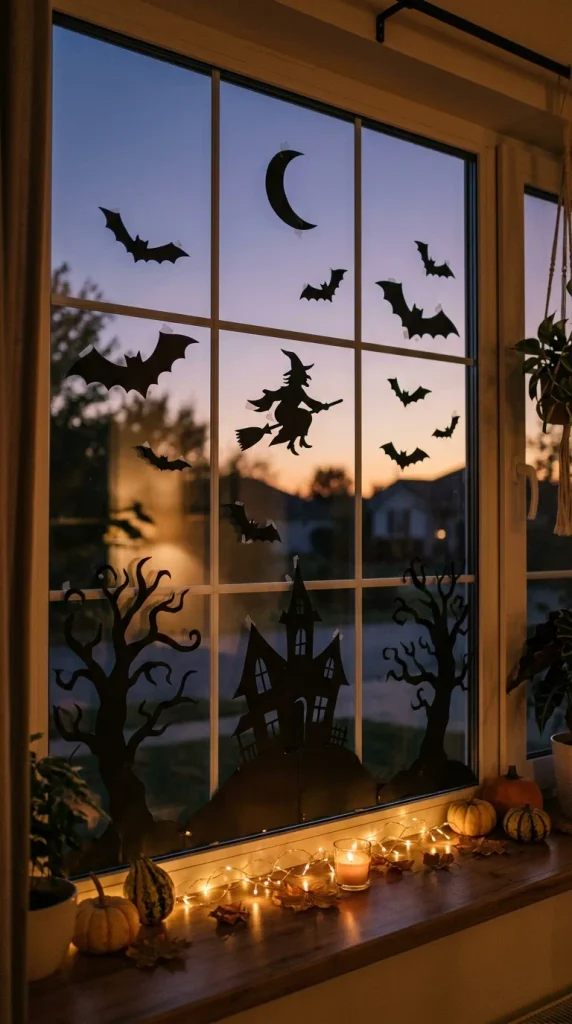
Halloween window silhouettes are an effective way to decorate your home from both inside and outside. Simple black shapes create dramatic shadows against a bright window during the day and can look especially striking when the room is softly illuminated in the evening.
Choose a theme before cutting your designs. Popular options include black cats, witches, haunted houses, bats, spiders, and crooked trees. Draw your shapes on black cardstock or trace them from templates, then cut them carefully with scissors.
Arrange the silhouettes across the lower or upper part of the window. You can create a haunted-house scene by combining a crooked house, flying bats, and a large moon. Alternatively, use a few large silhouettes for a clean, minimalist design.
Attach the shapes using removable tape or another window-safe method. Make sure the display does not obstruct your view when driving or walking near the windows, and keep emergency exits clear.
Materials needed: Black cardstock, pencil, scissors, templates, and window-safe removable adhesive.
DIY tip: Use a white or pale background behind the silhouettes where possible to improve contrast and make the designs easier to see.
6. Homemade Halloween Wreath
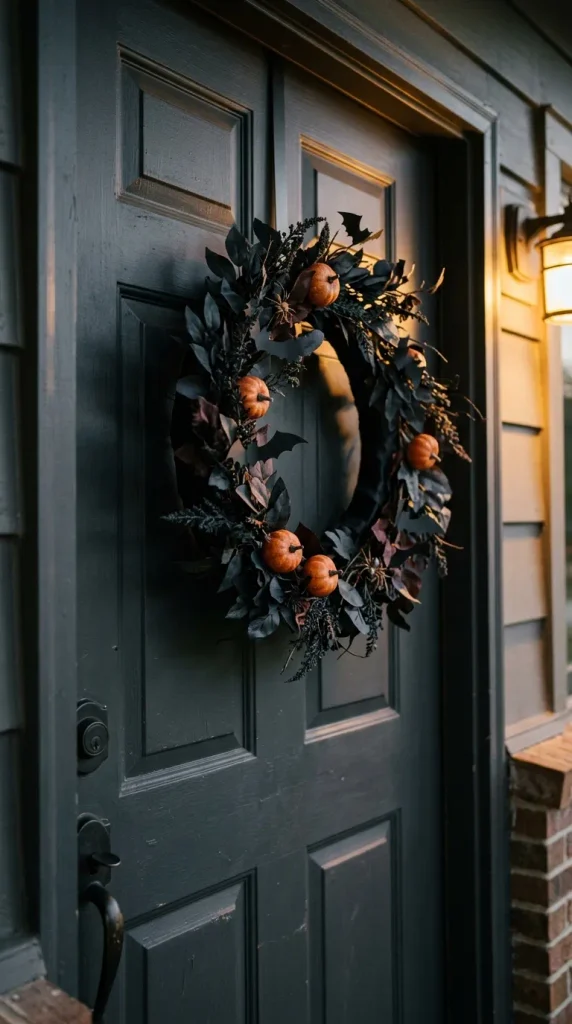
A homemade Halloween wreath is a welcoming decoration for your front door, entryway, or interior wall. Unlike traditional holiday wreaths, a Halloween version can be playful, spooky, elegant, or rustic depending on the materials and colors you choose.
Begin with a plain wreath base made from foam, cardboard, or lightweight branches. Cover it with black ribbon, artificial greenery, fabric strips, or yarn. Add Halloween details such as small artificial spiders, paper bats, miniature pumpkins, faux cobwebs, or decorative flowers in dark colors.
For a modern design, use a simple black wreath with a few orange accents. For a cute style, add small smiling ghosts and colorful pumpkins. A rustic wreath can feature natural twigs, muted foliage, and neutral-colored decorations.
Attach the decorations securely using craft glue, floral wire, or suitable fasteners. If the wreath will hang outdoors, choose weather-resistant materials and make sure the finished piece is firmly secured to the door or wall.
Materials needed: Wreath base, ribbon or fabric, artificial greenery, decorative Halloween shapes, scissors, and craft glue.
DIY tip: Leave a little space between decorative elements so the wreath doesn’t look overcrowded. A few well-placed details often create a more polished result.
7. DIY Halloween Spiderweb Decorations
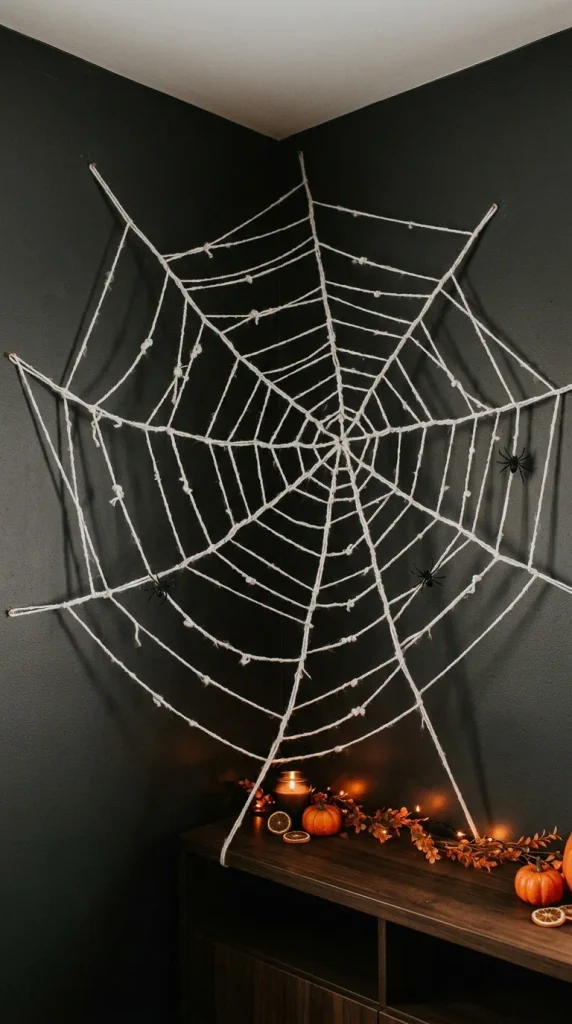
Spiderweb decorations are an easy way to add a creepy touch to corners, doorways, shelves, and party spaces. You can make them from white yarn, black yarn, string, or lightweight craft materials, depending on the look you want.
For a yarn web, begin by attaching several strands of yarn to a central point, creating a star-like structure. Secure the ends to suitable supports, then weave another strand around the spokes to form a web pattern. Tie or glue the yarn at intersections so the design stays in place.
You can make small webs for picture frames or larger ones for a wall display. Add lightweight artificial spiders for extra detail, but keep the decorations away from walkways where they could become a tripping hazard.
Another option is to cut a web from folded paper, similar to making a paper snowflake. This creates a flat design that works well on windows and walls.
Materials needed: White or black yarn, string, scissors, removable adhesive, and optional artificial spiders.
DIY tip: White yarn stands out beautifully against dark backgrounds, while black paper webs look dramatic on light-colored windows or walls.
8. Homemade Halloween Candy Display
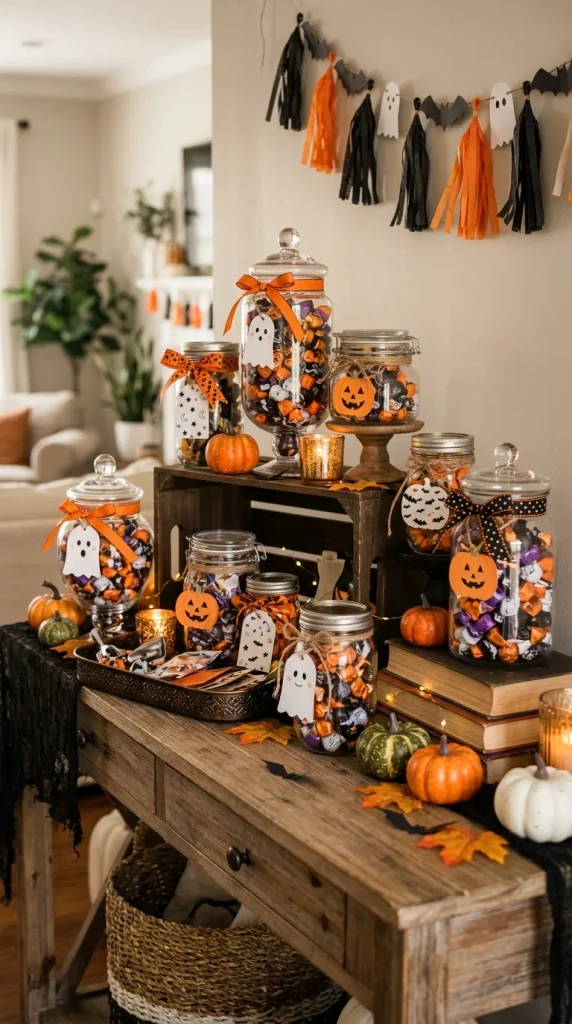
A Halloween candy display can become both a decoration and a practical serving station for parties, family gatherings, or trick-or-treat visitors. With a few jars, trays, and themed accents, you can create an attractive setup without buying a complete Halloween display.
Start with a small table, countertop, or console. Arrange clean containers of different heights and fill them with wrapped candy or individually packaged treats. Decorate the containers with simple ghost faces, pumpkin shapes, or black ribbon. Add a themed sign made from cardstock and place it near the center of the arrangement.
Use a color palette of orange, black, purple, and white to create a traditional Halloween look. If you prefer a softer style, choose cream, muted orange, and natural wood accents.
Make sure the display remains practical. Leave enough room for people to reach the treats, and keep food away from craft paint, loose glitter, and other materials that are not food-safe.
Materials needed: Clean jars or bowls, wrapped candy, cardstock, ribbon, markers, and a decorative tray.
DIY tip: Use containers of different heights to create visual interest, but keep heavier items on stable surfaces and place fragile containers away from table edges.
9. DIY Halloween Garland
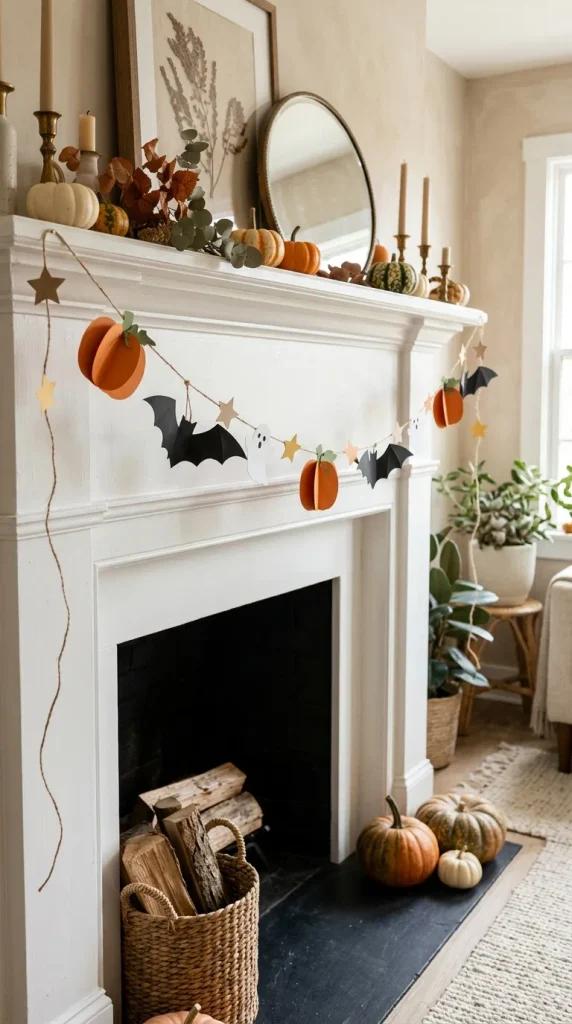
A homemade Halloween garland is an easy way to decorate mantels, windows, shelves, doorways, and party backdrops. Because garlands can be made from paper, felt, fabric, or lightweight cardstock, you can customize them to suit your budget and crafting skills.
Choose a design such as paper pumpkins, black bats, tiny ghosts, stars, or alternating Halloween shapes. Draw or trace the shapes onto your chosen material, then cut out enough pieces to create the desired length.
Attach the shapes to a length of string or ribbon using small clips, holes, or craft glue. Space the decorations evenly and alternate colors or shapes to create a balanced pattern. For example, you could combine orange pumpkins with black bats and white ghosts.
Hang the finished garland across a mantel, above a doorway, or along a wall. Use lightweight materials and secure both ends properly so the garland stays in place.
Materials needed: Colored cardstock or felt, string or ribbon, scissors, pencil, hole punch, and craft glue.
DIY tip: Make a few extra shapes before assembling the garland. This allows you to adjust the spacing and length without needing to create more pieces later.
10. DIY Spooky Halloween Entryway Display
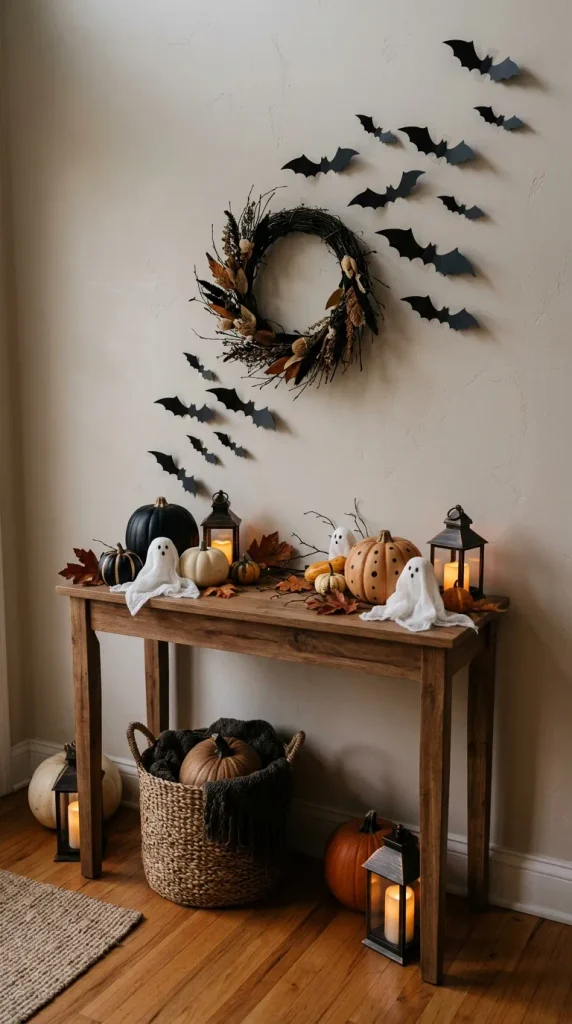
Your entryway is the perfect place to create a memorable Halloween display because it welcomes guests and sets the mood for the rest of your home. A simple arrangement of homemade decorations can turn a small corner into a festive seasonal feature.
Start by choosing a main element, such as a painted pumpkin, a homemade ghost, or a Halloween wreath. Arrange smaller decorations around it, including paper bats, LED lanterns, artificial autumn leaves, and a decorative sign. Use a small table or console if you have enough space, or create a wall display if your entryway is narrow.
For a spooky look, use black and orange decorations with ghost silhouettes and soft LED lighting. For a friendlier family style, choose smiling pumpkins, cheerful ghosts, and colorful paper garlands.
Keep the arrangement at a manageable height and leave the floor clear so visitors can move safely through the entrance. If decorating a porch, use outdoor-suitable materials and secure lightweight items against wind.
Materials needed: Pumpkins, paper decorations, a wreath or garland, LED lanterns, decorative signs, and removable adhesive.
DIY tip: Choose one main decoration and build the rest of the display around it. A clear focal point helps the entryway look coordinated rather than cluttered.
Conclusion
Homemade Halloween decorations are a wonderful way to celebrate the season while expressing your creativity and personal style. These 10 ideas offer affordable projects for different areas of your home, from hanging ghosts and paper bats to glowing jar lanterns, spooky window silhouettes, and welcoming entryway displays.
You don’t need expensive supplies or advanced crafting skills to make your home feel festive. Start with materials you already have, choose a color scheme you love, and create one or two decorations at a time. You can make the designs cute and playful for a family-friendly atmosphere or darker and more dramatic for a traditional spooky look.
With a little imagination and some simple DIY techniques, you can create homemade Halloween decorations that make your home feel special, welcoming, and ready for October celebrations.