Milky pink nails have become one of the most timeless and elegant nail trends in recent years. Loved for their soft, clean, and effortlessly chic appearance, milky pink nails strike the perfect balance between natural and polished. This nail style works beautifully across all skin tones and nail lengths, making it a go-to choice for everyday wear, weddings, professional settings, and minimal beauty lovers.

Unlike sheer nude or bold pink shades, milky pink nails offer a creamy, semi-opaque finish that smooths the nail bed while still looking light and natural. The subtle pink tone adds warmth, while the milky base creates a soft-focus effect that hides imperfections and enhances nail shape. This is why milky pink nails are often described as “your nails but better.”
Pinterest searches for milky pink nail ideas continue to rise because this style is versatile, photogenic, and incredibly wearable. From glossy short nails to long almond-shaped designs, milky pink can be customized in countless ways. It can be worn plain for a minimalist aesthetic or elevated with subtle nail art, shimmer, chrome, or delicate details.
Another major reason milky pink nails are so popular is their suitability for beginners. These designs don’t require advanced nail art skills and often rely on clean application and simple techniques. Whether you prefer DIY manicures at home or salon-quality results, milky pink nails are achievable with the right polish and preparation.
In this two-part guide, you will explore 20 milky pink nail ideas, broken into two detailed sections. Each idea is designed to be practical, elegant, and Pinterest-worthy. Every nail idea includes a clear explanation, step-by-step guidance, and a list of tools or materials needed so you can recreate the look confidently.
Below is Part 1, featuring the first 10 milky pink nail ideas.
1. Classic Milky Pink Glossy Nails
Introduction
Classic milky pink glossy nails are the foundation of this trend. Clean, shiny, and understated, this look is perfect for everyday wear and formal occasions alike.

What This Nail Look Is
A soft milky pink shade applied evenly with a high-gloss finish.
How to Achieve It
- Shape and file nails evenly.
- Prep cuticles and buff nail surface.
- Apply base coat.
- Apply two thin coats of milky pink polish.
- Finish with glossy top coat.
Tools / Materials Used
- Nail file
- Cuticle pusher
- Base coat
- Milky pink nail polish
- Glossy top coat
2. Short Milky Pink Nails
Introduction
Short milky pink nails look clean, neat, and effortlessly stylish, making them ideal for daily routines and low-maintenance lifestyles.
What This Nail Look Is
Milky pink polish on short, rounded or square nails.

How to Achieve It
- Trim nails short and shape evenly.
- Buff nail beds lightly.
- Apply base coat.
- Apply milky pink polish.
- Seal with top coat.
Tools / Materials Used
- Nail clippers
- Nail file
- Base coat
- Milky pink polish
- Top coat
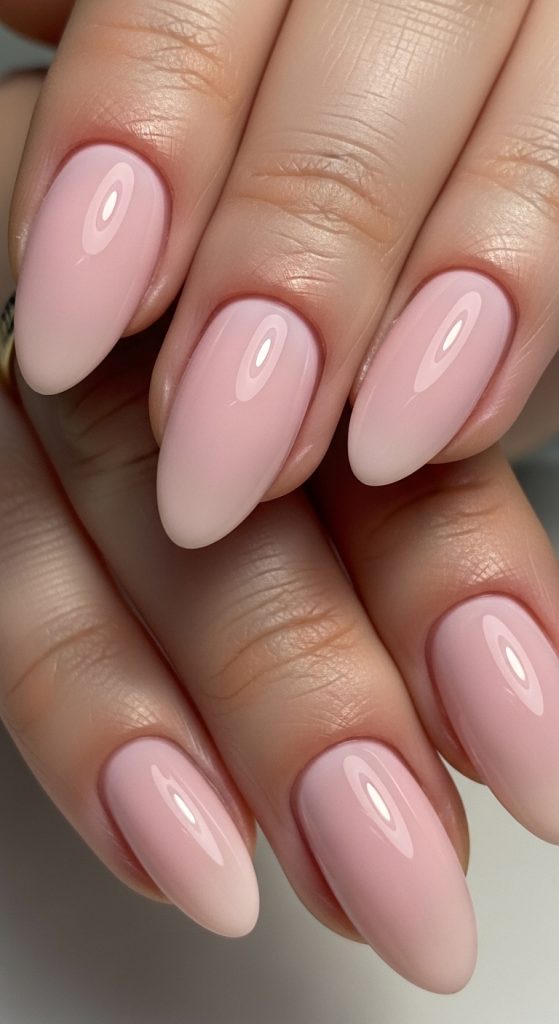
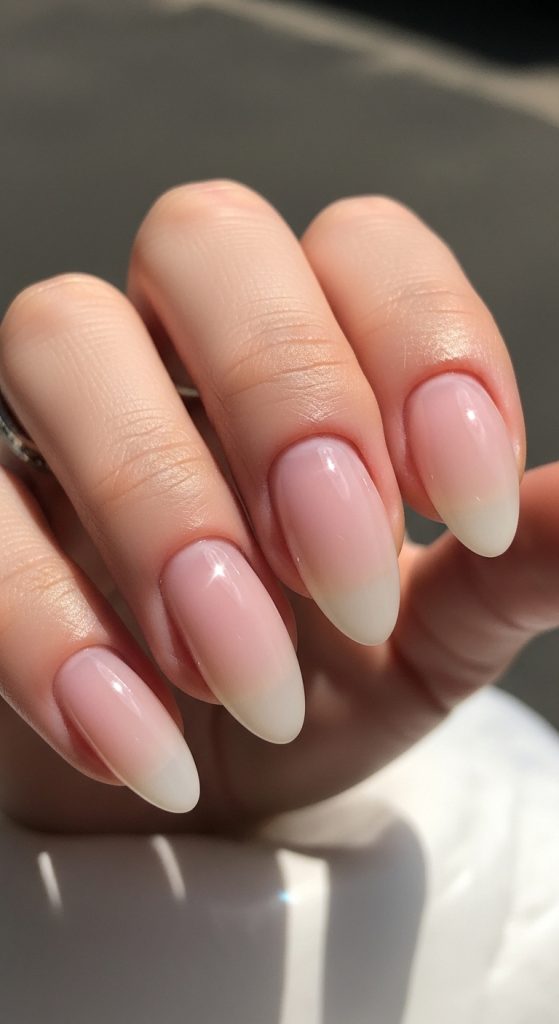
3. Milky Pink Almond Nails
Introduction
Almond-shaped nails paired with milky pink polish create an elegant and elongating effect.
What This Nail Look Is
Soft almond nail shape finished with milky pink color.
How to Achieve It
- File nails into almond shape.
- Smooth edges carefully.
- Apply base coat.
- Layer milky pink polish.
- Finish with glossy top coat.
Tools / Materials Used
- Nail file
- Buffer
- Base coat
- Milky pink polish
4. Milky Pink French Tip Nails
Introduction
This modern take on the French manicure keeps the look soft and subtle.

What This Nail Look Is
Milky pink base with thin white or soft pink tips.
How to Achieve It
- Apply milky pink base.
- Use a liner brush for tips.
- Keep tips thin and soft.
- Seal with top coat.
Tools / Materials Used
- Milky pink polish
- White or pale pink polish
- Nail art brush
- Top coat
5. Milky Pink Square Nails
Introduction
Square nails with milky pink polish create a clean, modern aesthetic.
What This Nail Look Is
Straight-edged square nails with milky pink color.
How to Achieve It
- File nails into square shape.
- Buff edges smooth.
- Apply base coat.
- Apply milky pink polish.
- Finish with top coat.
Tools / Materials Used

- Nail file
- Buffer
- Base coat
- Milky pink polish
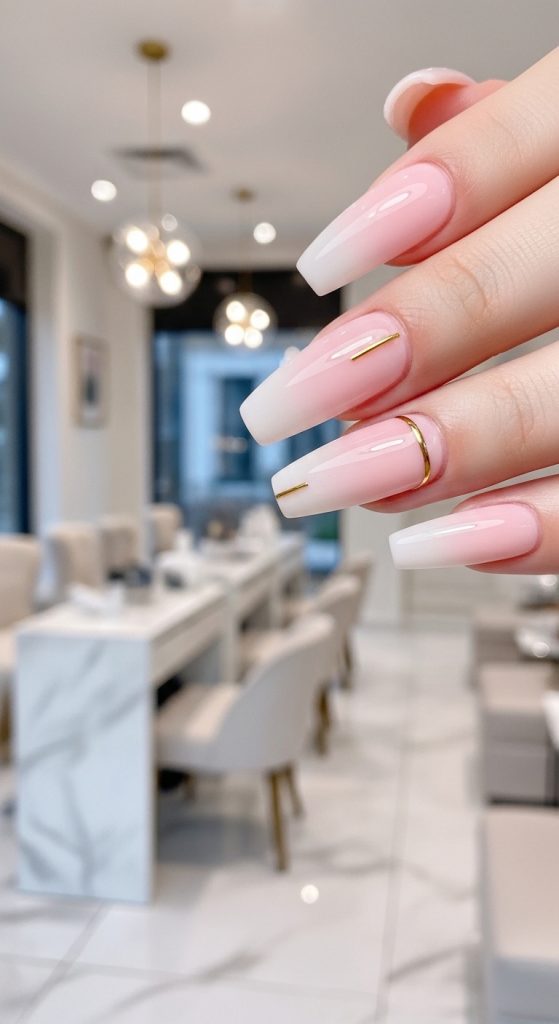
6. Milky Pink Ombre Nails
Introduction
Milky pink ombre nails blend softness and dimension beautifully.

What This Nail Look Is
A gradient fade from sheer pink to milky white.
How to Achieve It
- Apply sheer pink base.
- Dab milky white polish using sponge.
- Blend gently.
- Repeat until smooth.
- Seal with glossy top coat.
Tools / Materials Used
- Makeup sponge
- Sheer pink polish
- Milky white polish
- Top coat
7. Milky Pink Nude Nails

Introduction
This look leans more natural, perfect for minimalists.
What This Nail Look Is
A neutral milky pink shade that mimics natural nail tone.
How to Achieve It
- Prep nails carefully.
- Apply thin coats of nude milky pink.
- Keep layers sheer.
- Seal with glossy top coat.
Tools / Materials Used
- Base coat
- Nude milky pink polish
- Top coat
8. Milky Pink Coffin Nails
Introduction
Coffin-shaped nails paired with milky pink offer a trendy yet elegant look.

What This Nail Look Is
Long coffin nails finished in milky pink polish.
How to Achieve It
- Shape nails into coffin style.
- Buff surface smooth.
- Apply base coat.
- Apply milky pink polish.
- Finish with top coat.
Tools / Materials Used
- Nail file
- Buffer
- Base coat
- Milky pink polish
9. Milky Pink Gel Nails
Introduction
Gel milky pink nails are long-lasting and ultra-glossy.
What This Nail Look Is
Milky pink gel polish cured under UV/LED light.
How to Achieve It
- Prep nails thoroughly.
- Apply gel base coat and cure.
- Apply milky pink gel polish.
- Cure each layer.
- Apply gel top coat and cure.
Tools / Materials Used
- Gel base coat
- Milky pink gel polish
- UV/LED lamp
- Gel top coat
10. Milky Pink Natural Nails
Introduction
This look enhances natural nails without extensions or heavy shaping.
What This Nail Look Is
Milky pink polish on natural nail length.

How to Achieve It
- Clean and shape natural nails.
- Apply base coat.
- Apply one to two coats of milky pink.
- Seal with top coat.
Tools / Materials Used
- Nail file
- Base coat
- Milky pink polish
- Top coat
11. Milky Pink Chrome Nails
Introduction
Milky pink chrome nails are soft, glossy, and luxurious without being overpowering. This look elevates classic milky pink with a subtle reflective finish that looks elegant in any lighting.
What This Nail Look Is
A milky pink base topped with a pearl or chrome powder for a glass-like sheen.
How to Achieve It
- Prep and shape nails.
- Apply base coat and cure if using gel.
- Apply milky pink polish and cure.
- Rub chrome powder gently over nails.
- Seal with glossy top coat.
Tools / Materials Used
- Milky pink polish
- Chrome powder
- Applicator sponge
- Top coat
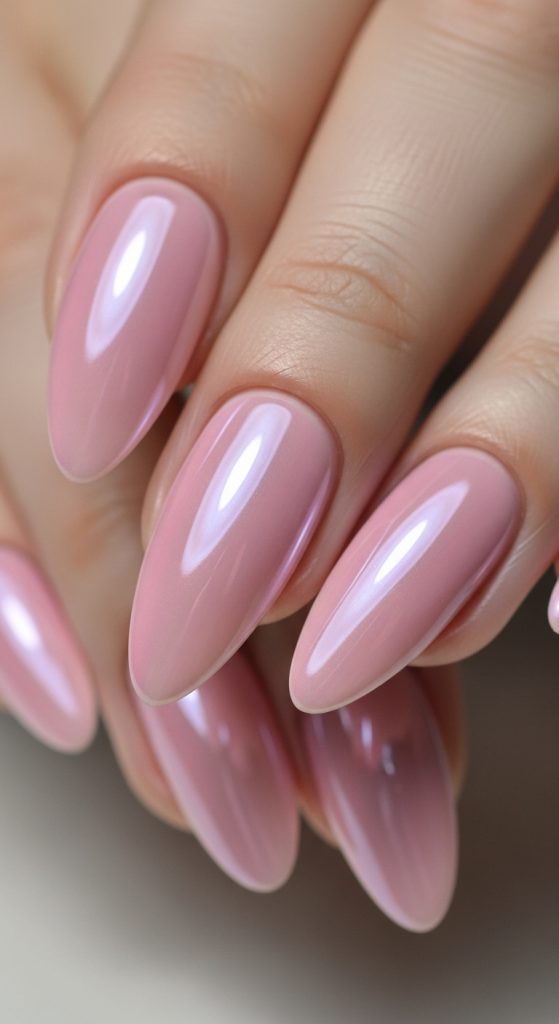
12. Milky Pink Pearl Nails
Introduction
Pearl-effect milky pink nails look soft, feminine, and bridal-inspired, making them perfect for weddings or special occasions.

What This Nail Look Is
Milky pink nails with a subtle pearlescent glow.
How to Achieve It
- Apply milky pink base color.
- Add pearl-effect polish or powder.
- Keep application light.
- Seal with glossy top coat.
Tools / Materials Used
- Milky pink polish
- Pearl shimmer polish or powder
- Top coat
13. Milky Pink Minimal Nail Art
Introduction
Minimal nail art keeps milky pink nails clean while adding a small decorative touch.

What This Nail Look Is
Milky pink nails with tiny dots, lines, or accents.
How to Achieve It
- Apply milky pink base.
- Use dotting tool or liner brush.
- Add minimal design on one or two nails.
- Seal with top coat.
Tools / Materials Used
- Dotting tool
- Nail art brush
- Milky pink polish
- Top coat
14. Milky Pink Heart Accent Nails
Introduction
Heart accents add a cute and playful detail while keeping the overall look soft and feminine.

What This Nail Look Is
Milky pink nails with small heart designs on accent nails.
How to Achieve It
- Apply milky pink base.
- Draw tiny hearts using liner brush.
- Keep design minimal.
- Finish with top coat.
Tools / Materials Used
- Nail art brush
- Pink or white polish
- Milky pink base
- Top coat
15. Milky Pink Glitter Accent Nails

Introduction
Glitter accent nails add sparkle while maintaining the elegance of milky pink.
What This Nail Look Is
Milky pink nails with one or two glitter accent nails.
How to Achieve It
- Apply milky pink polish.
- Apply glitter polish on accent nail.
- Blend lightly if needed.
- Seal with top coat.
Tools / Materials Used
- Glitter polish
- Milky pink polish
- Top coat
16. Milky Pink Matte Nails
Introduction
Matte milky pink nails look modern, soft, and minimal.

What This Nail Look Is
Milky pink nails finished with a matte top coat.
How to Achieve It
- Apply milky pink polish.
- Allow to dry completely.
- Apply matte top coat evenly.
- Let set fully.
Tools / Materials Used
- Milky pink polish
- Matte top coat
17. Milky Pink Floral Nails
Introduction

Floral designs add a romantic touch to milky pink nails without overwhelming them.
What This Nail Look Is
Milky pink base with delicate floral details.
How to Achieve It
- Apply milky pink base.
- Use fine brush to paint flowers.
- Add small dot centers.
- Seal with glossy top coat.
Tools / Materials Used
- Fine nail art brush
- White or pastel polish
- Milky pink base
- Top coat
18. Milky Pink Swirl Nails
Introduction
Swirl designs give milky pink nails a trendy, artistic feel while staying soft.
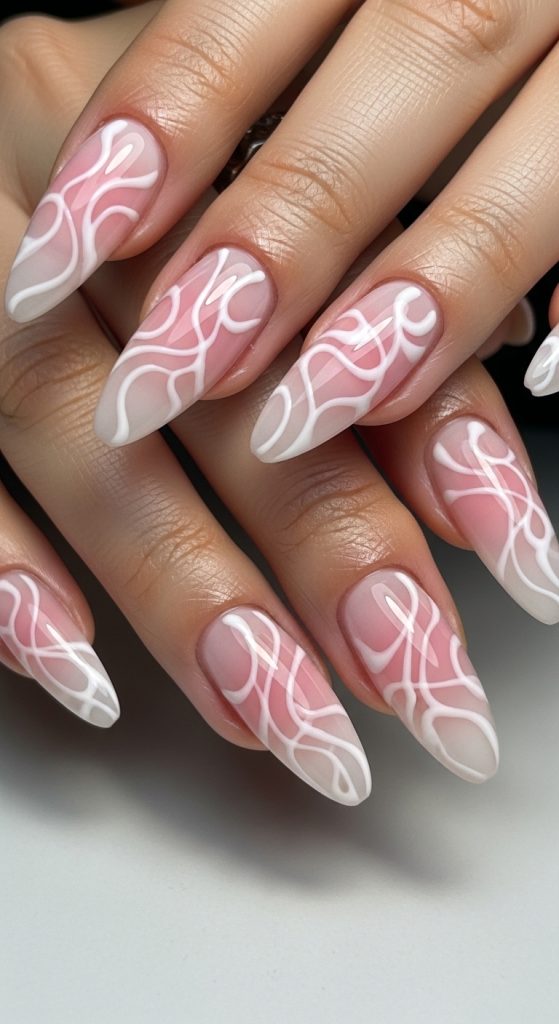
What This Nail Look Is
Curved swirl lines layered over a milky pink base.
How to Achieve It
- Apply milky pink base.
- Draw thin swirl lines with liner brush.
- Keep colors subtle.
- Seal with top coat.
Tools / Materials Used
- Nail art liner brush
- White or pale pink polish
- Top coat
19. Milky Pink Rhinestone Nails
Introduction
Rhinestones add a touch of glamour while keeping the base soft and elegant.
What This Nail Look Is
Milky pink nails with small rhinestone accents.
How to Achieve It
- Apply milky pink base.
- Place rhinestones using nail glue.
- Keep placement minimal.
- Seal carefully with top coat.
Tools / Materials Used

- Rhinestones
- Nail glue
- Milky pink polish
- Top coat
20. Milky Pink Sheer Jelly Nails
Introduction
Sheer jelly milky pink nails are glossy, translucent, and incredibly trendy.
What This Nail Look Is
A sheer milky pink finish with a jelly-like appearance.
How to Achieve It
- Apply sheer milky pink polish.
- Build thin layers gradually.
- Keep transparency even.
- Seal with high-gloss top coat.
Tools / Materials Used
- Sheer milky pink polish
- Glossy top coat